Getting started with lemlab
General
In order to further enable the integration of ever-increasing shares of decentralized electricity generation and flexible prosumers, local/regional energy markets (LEM) are being investigated as a potential solution to maximize local matching of generation of consumption in order to relieve pressure on electrical grids by leveraging the inherent temporal flexibility of the smart prosumer.
Investigating the unique challenges involved in constructing stable and efficient LEMs usually involves the setting up of complex and extensive simulation environments, the collection of sufficient data and deep technical knowledge of all components involved. Only then can the desired solution be implemented and tested. Developing software or hardware tools for deployment in the field typically requires the development of hardware/software-in-the-loop (XiL) development environments in order to test prototypes and before field testing can commence.
lemlab was designed specifically with these use cases in mind. lemlab allows the user to simulate a LEM using a full agent-based modelling (ABM) in either simulation (SIM) or real-time (RTS) modes. This allows the rapid testing of algorithms as well as the real-time integration of hardware and software components.
Installation guide
lemlab is maintained using a combination of PyCharm, PostgreSQL, Gurobi and Anaconda. This installation guide will explain the procedure for this software combination. It is recommended that beginners follow this guide.
Install the following software
PyCharm (Community or Professional)
Anaconda Individual Edition
PostgreSQL*
Gurobi* or CPLEX. GLPK can be used although this is non-ideal.
Clone repository You can download or clone the repository to a local directory of your choice. You can use version control tools such as GitHub Desktop, Sourcetree, GitKraken or pure Git. The link for pure Git is:
git clone https://github.com/tum-ewk/lemlab.git
If using PyCharm, clone the repository to ./PyCharmProjects/lemlab/
- Create a virtual python environment
Open the AnacondaPrompt.
Type conda env create -f ./PycharmProjects/lemlab/lemlab-env.yaml
Take care to set the correct (absolute) path to your cloned repository.
- Activate the environment
Open PyCharm
Go to ‘File->Open’
Navigate to PyCharmProjects and open lemlab
- When the project has opened, go to
File->Settings->Project->Python Interpreter->Show all->Add->Conda Environment->Existing environment->Select folder->OK`
- Install a solver (we recommend Gurobi)
Go to gurobi.com
Create an account with your university email
When the account has been activated, log in and download the newest Gurobi solver.
Go to Academia->Academic Program and Licenses
Follow the installation instructions under “Individual Academic Licenses” to activate your copy of Gurobi
- Install and configure PostgreSQL
Install PostgreSQL from https://www.postgresql.org/
if possible, select port 5432. If this is not possible, you will need to edit the configuration file before executing any simulations
When your installation has been completed, launch pgAdmin 4
Select your local server (PostgreSQL 13)
- Open Login/Group Roles and create two new login roles as follows
- name: admin_lem
password: admin privileges: can login
superuser
- name: market_participant
password: user privileges: can login
Test your installation
navigate to ./PycharmProjects/lemlab/code_examples
execute sim_1_create_scenario.py, followed by sim_3_run.py
When the simulation has completed (this may take some time, depending on your system), analyze the results by executing sim_4_plot_results.py
Look at the output plots under lemlab/simulation_results/test_sim/analyzer/
Your installation was successful if you see plots similar to the following:
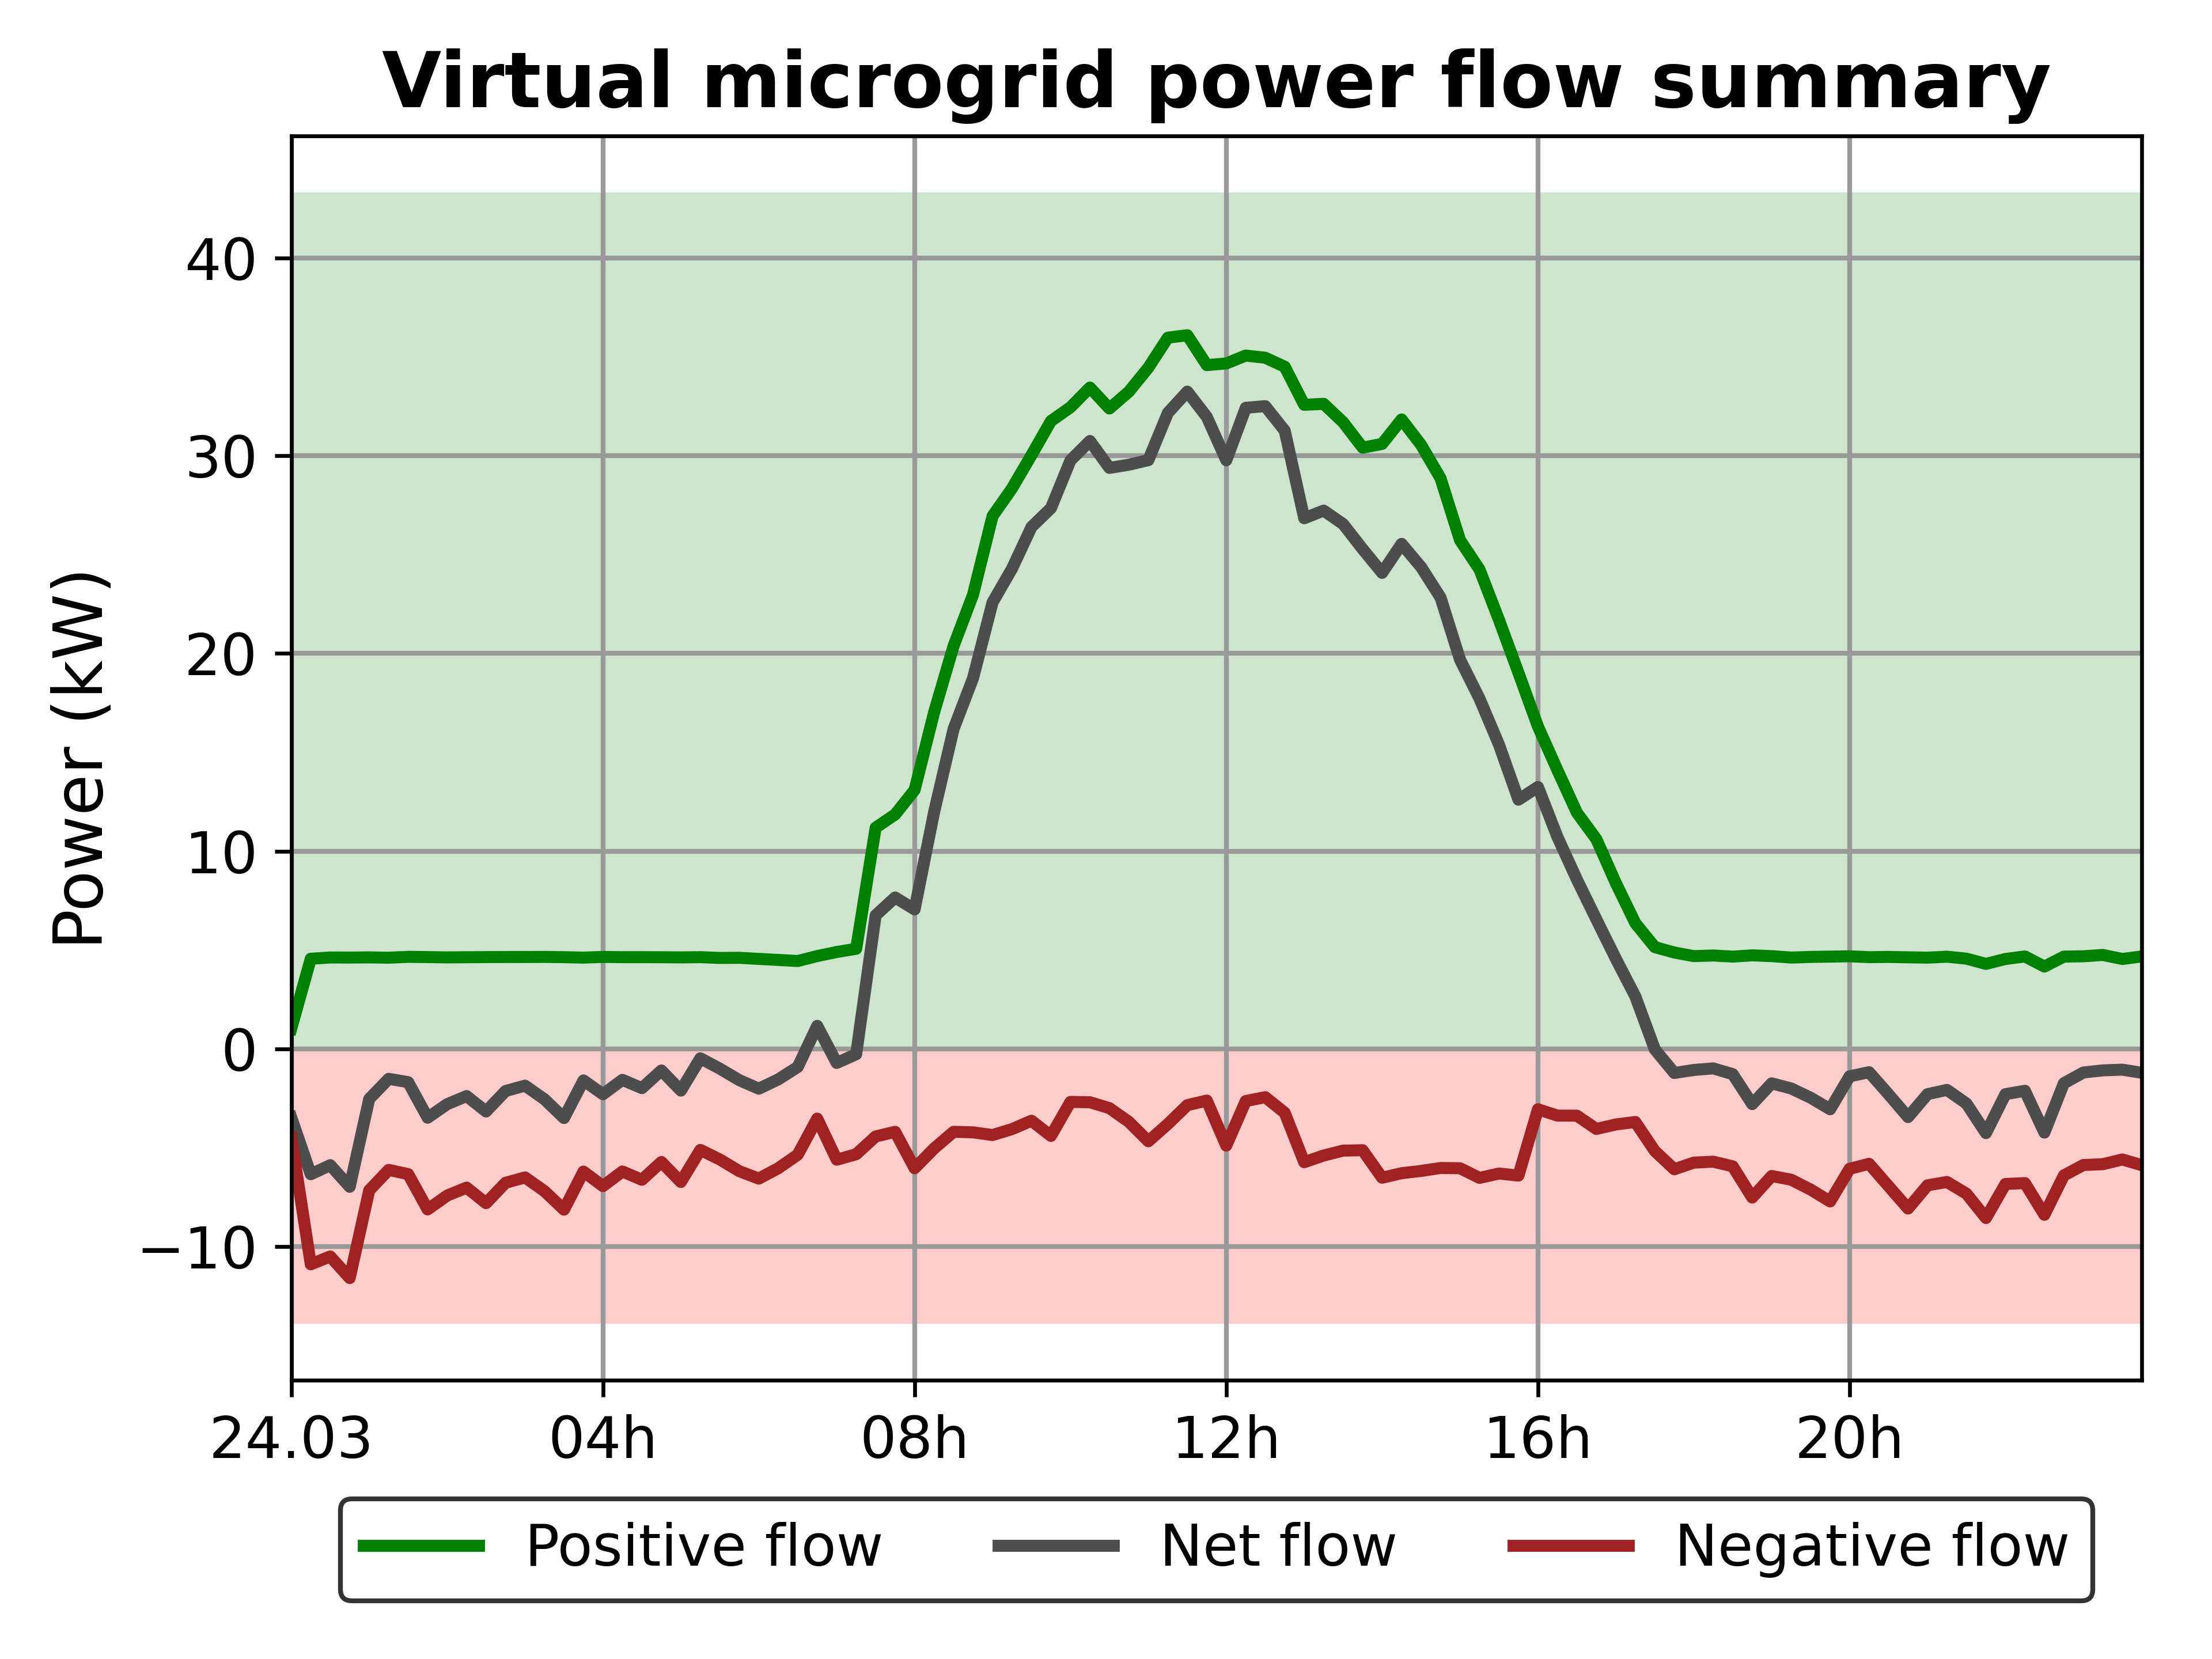

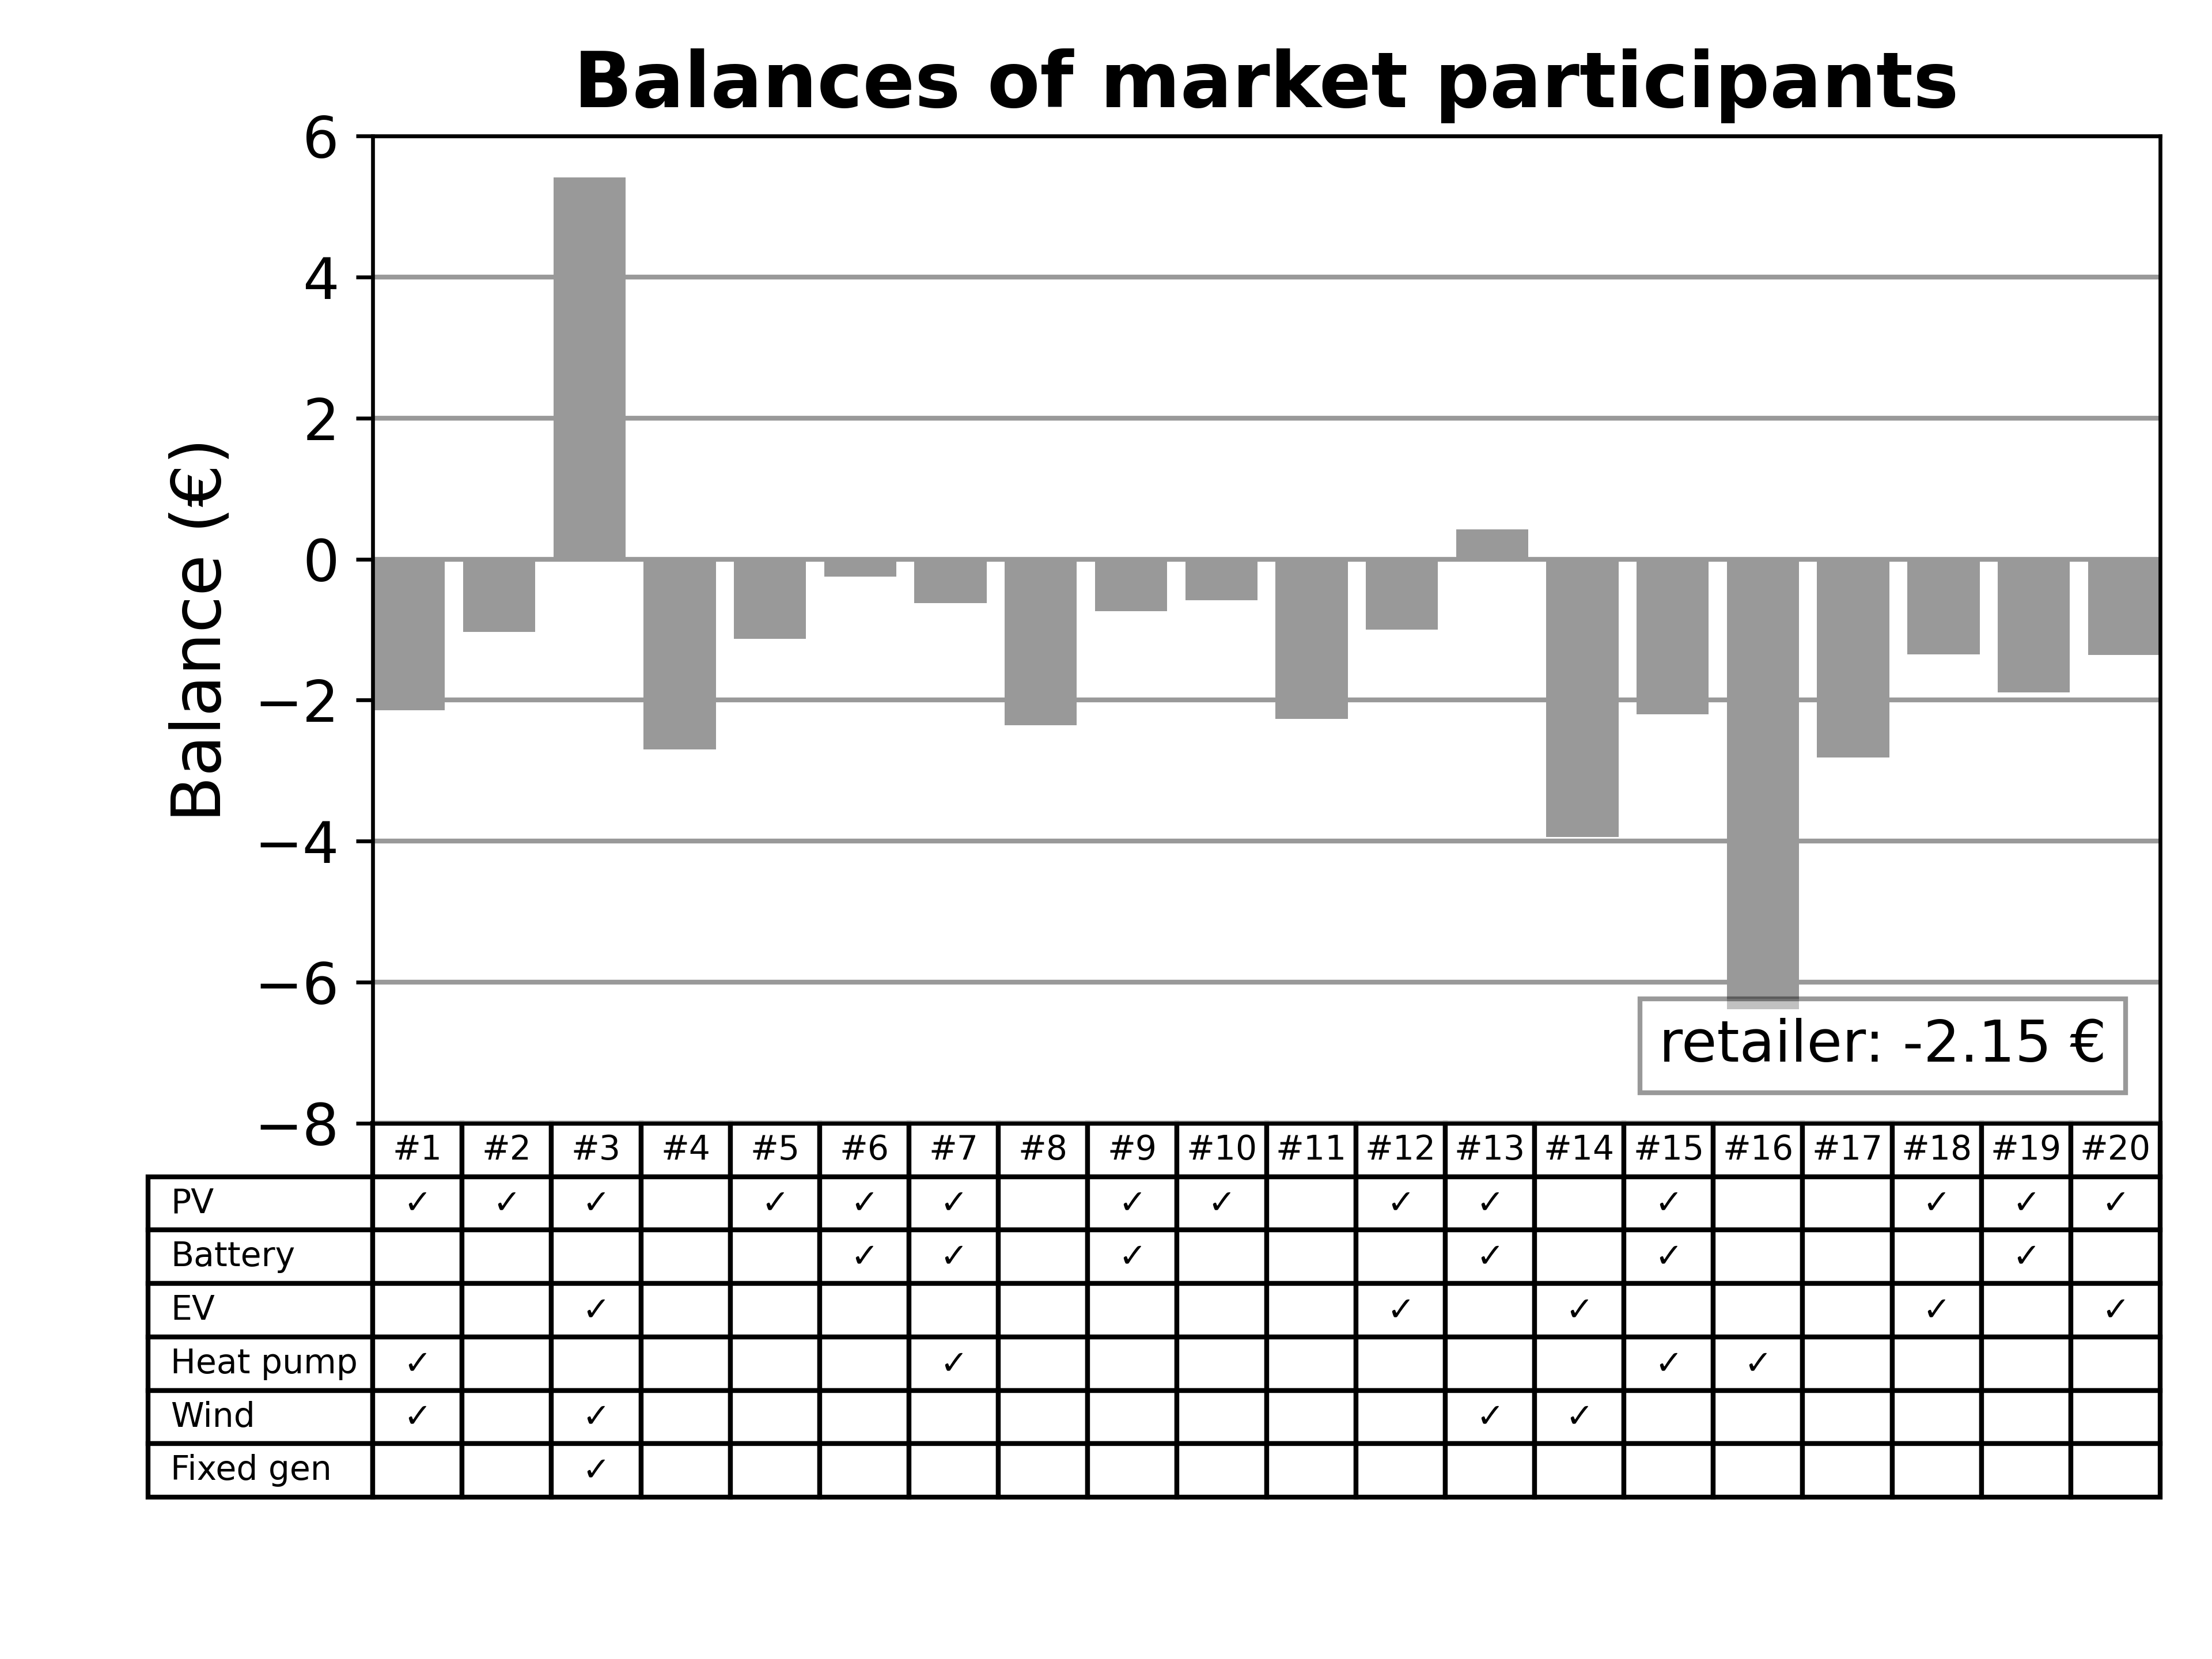

.png)
.png)